Expand your local storage on a Hetzner Cloud server with Volumes
by Thomas
Created at 2019-06-17

The Hetzner Cloud is an amazing interface for virtual servers. It has many extremely useful features and renting a server can be done in just a few seconds. However, there is one issue which can be problematic for its users: the local disk space of the products. The CX11 for example comes with only 20 GB:
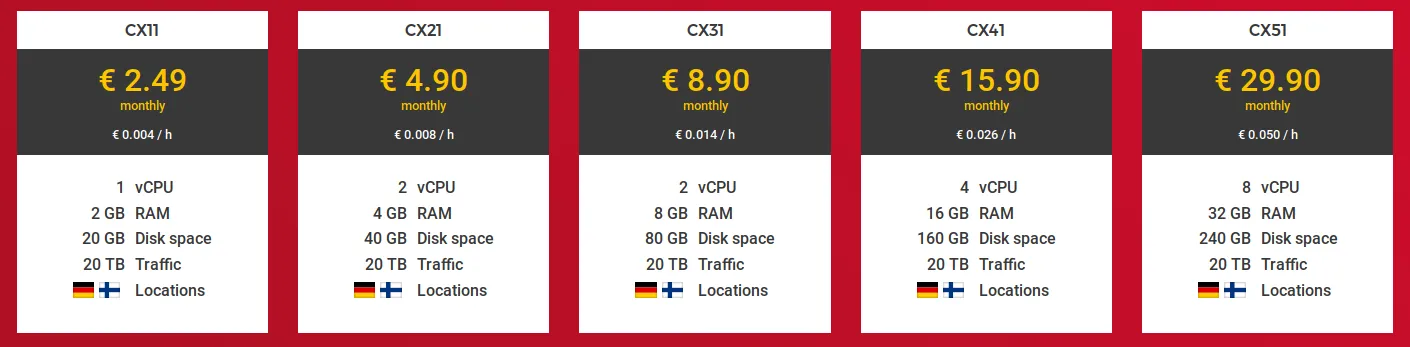
If you want to increase this disk space, you can easily scale the server to the next bigger product. But what if you want to combine the 1 vCPU, 2 GB RAM with a100 GB disk space? One possibility to increase your space would be the volumes feature.
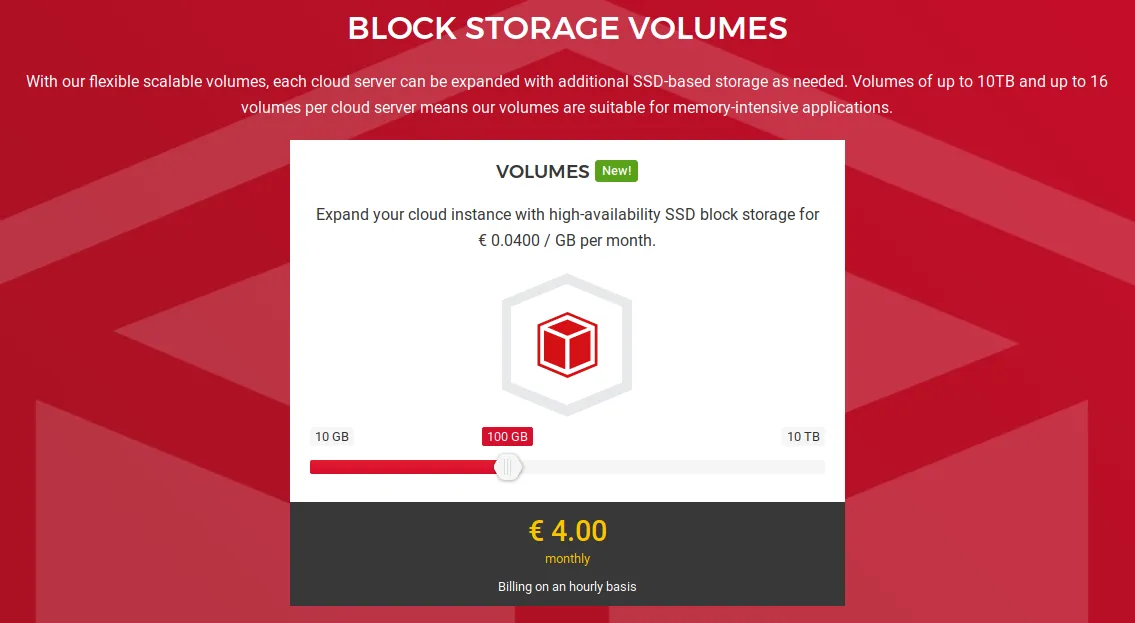
The problem with this volumes is that they are handled like a second block device by Linux OS. They function as a second disk. This means they do not increase your local disk space. You can mount them to a folder like /opt/movies where your big data are stored
and you have increased your disk space by them. But there is also a way to add them to the local disk.
To do that, we have to create an LVM during the installation process and while the system is running, we can expand the local disk space to our volume through the LVM.
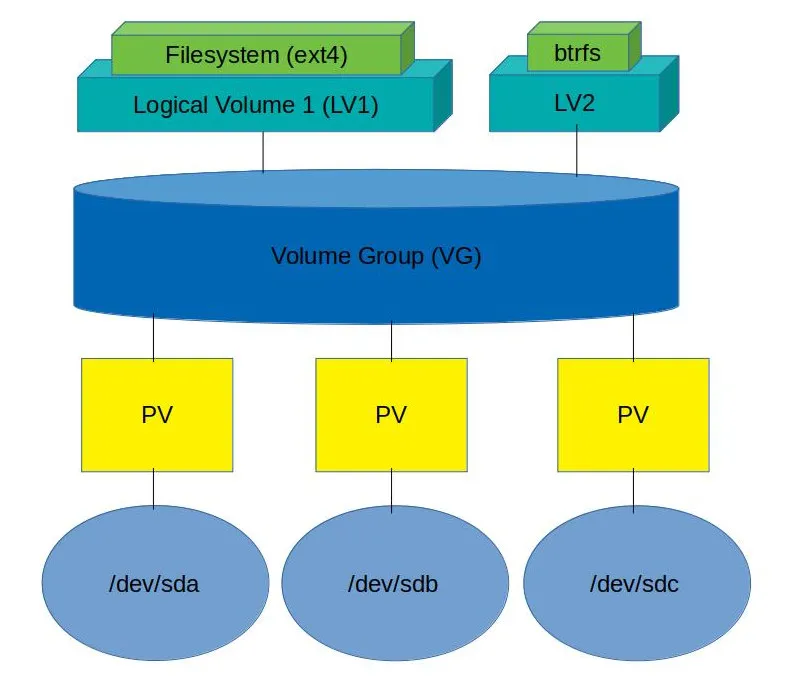
LVM – Logical Volume Manager
To understand how the LVM works and what it is that is actually happening, we have to clarify what an LVM is. There are four main parts in an LVM: our physical devices (disks; /dev/sd(x)), physical Volume (PV), volume groups (VG), and logical volumes (LV). The volume group could be the whole storage out of the physical disks. But keep in mind, if one disk crashes, all data are gone because we do not have RAID system in this setup. Out of the volume group you can create logical volumes. They can have whatever size you want it to have. On top of the logical volumes, we can create a file system like ext4 for instance. On this file system, we will install our OS to which we can add another disk at any time, even when our system is running, add it to the volume group and expand the file system on top of the logical volume.
Setup at Hetzner Cloud with CEPH Storage Server and Volume
Let us start with setting up a Hetzner Cloud server. First, we create a server based on CEPH storage. Why would we use a CEPH storage? In this case it makes sense to use the CEPH storage as volumes should taken out of the CEPH storage pool and that is why we don’t need the speed of the local NVMe SSDs. Next, you have to create the server out of one of the standard images. Mount an ISO (in our setup we will use Debian) and reboot your server. It will boot from the server at the next restart and we can install our system from the remote console.
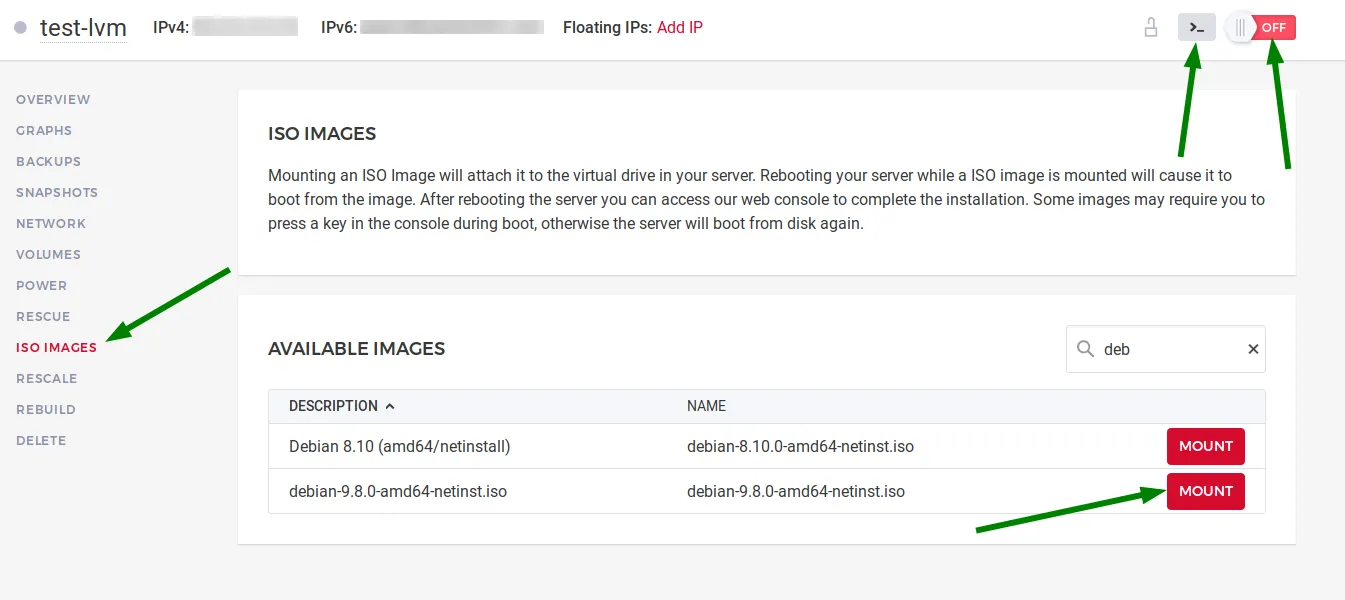
With the help of some screenshots, I will show what steps are important during the installation of Debian.
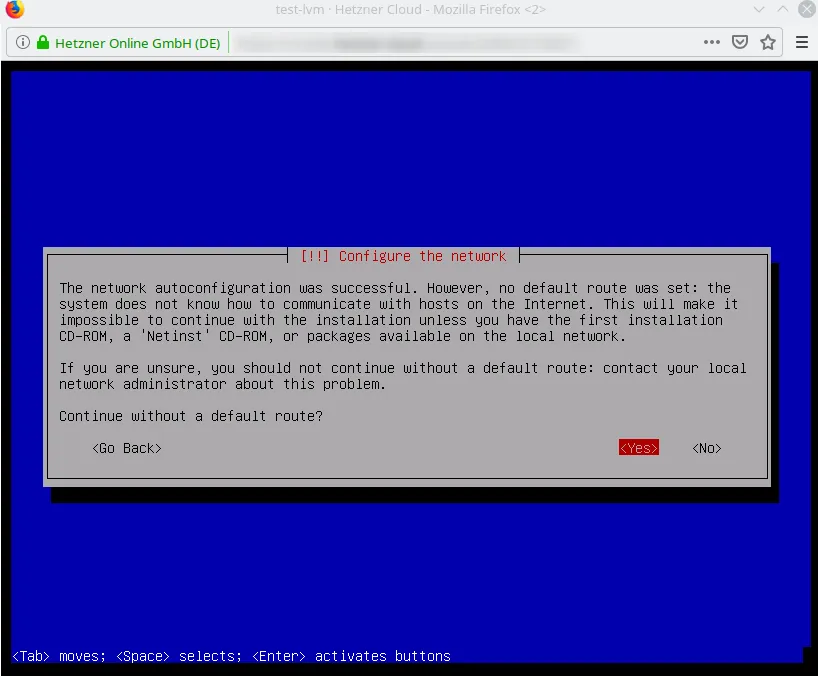
First, we will choose “Install”. Select your language, your location and your keyboard layout. At this point, we finally reach the network configuration and it will prompt an error saying that we could not find any network route. Select “Yes” to continue without a default route.
Select the name server address 213.133.100.100, choose any custom hostname, domain name and set your user settings for root etc.
During the next step, we need to partition our disks. Please select “Guided – use entire disk and set up LVM”.
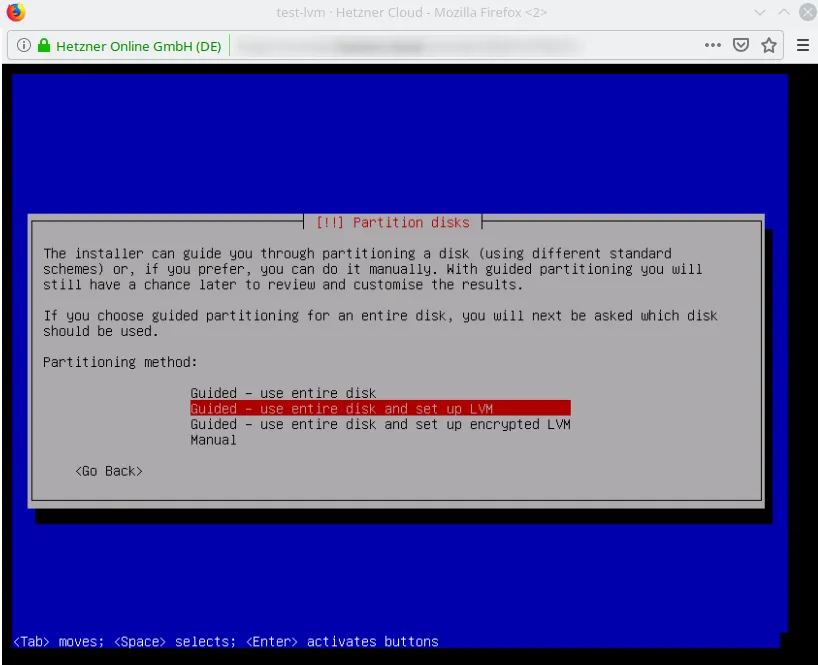
Select your disk SCSI3 (0,0,0) (sda) and choose “All files in one partition (recommended for new users)” in the next window.
Now we only need to delete the logical volume swap because we don’t need a swap partition for servers with SSDs. Select “Configure the Logical Volume Manager”.
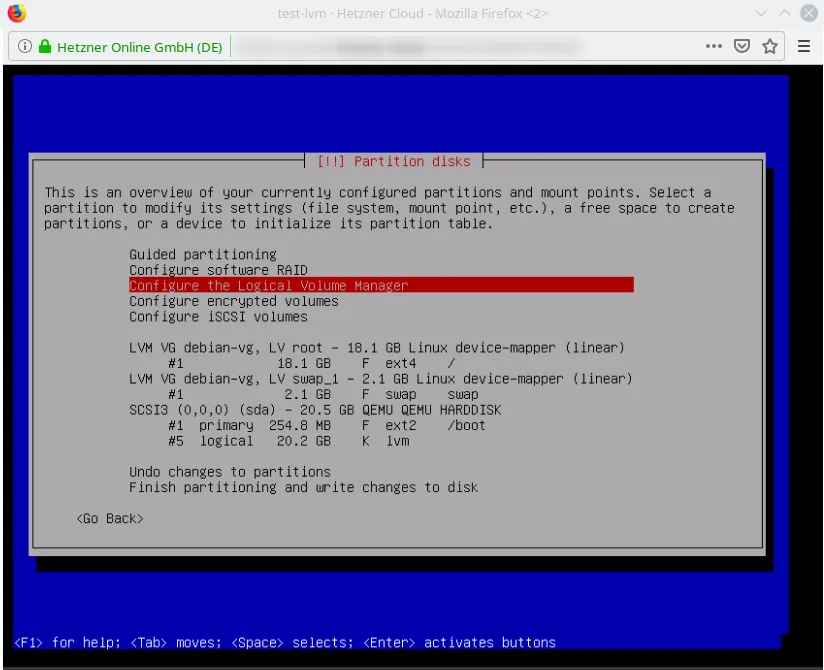
Select “Delete logical volume”, select the swap_1 and finish it. From the menu of the partition disk, we can select “Finish partitioning and write changes to disk”. Select “No” in the next window as we will not have a swap.
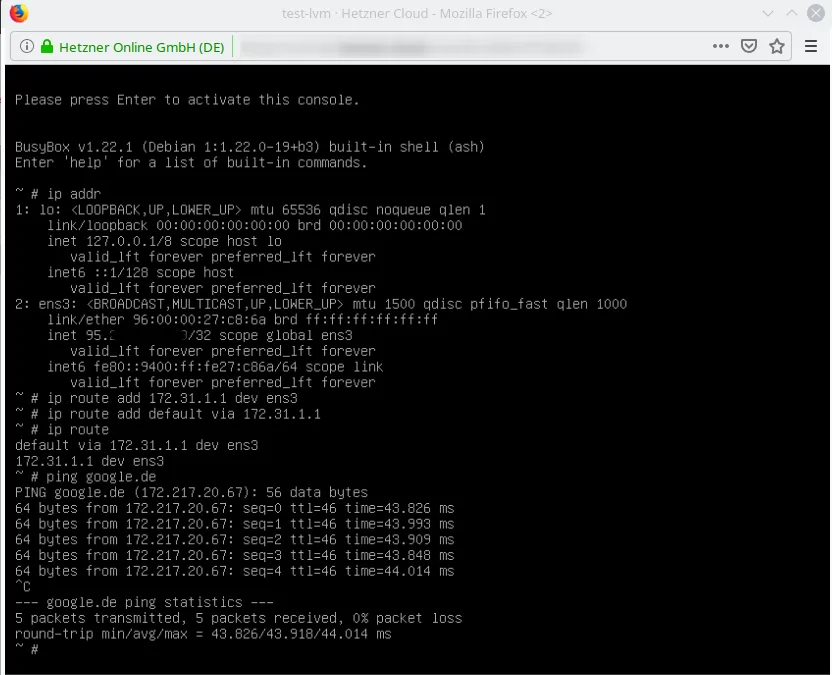
Now another window appears. There, we need to set a mirror to install Debian. The main problem here is the missing network connection, that is why a manual setup of the host route in the Hetzner network is necessary. Please press the keys “Alt + arrow right”. After the configuration, press “Alt + arrow left” to go back to the installation wizard.
This is also described in the Hetzner wiki:
You can let install Grub on the main partition /dev/sda.
We have finally made it and just need to log in and add a volume to our server. Because we have installed the OS manually, we need to pursue the following steps out of the Hetzner Wiki:

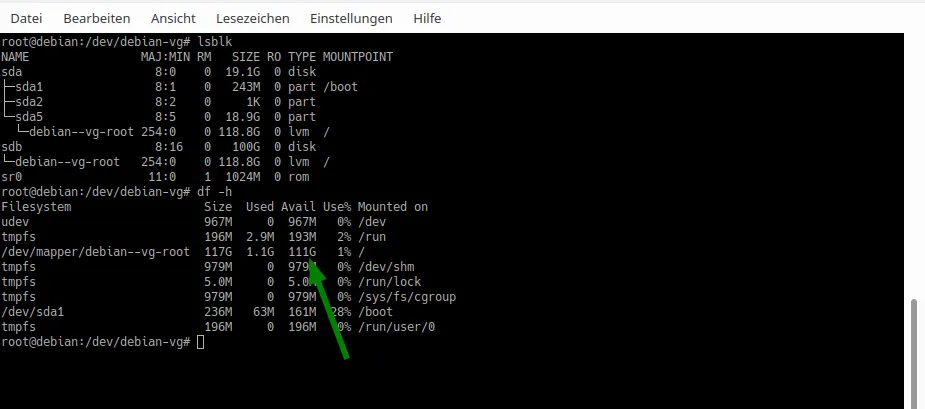
So far, we have seen that our main disk /dev/mapper/debian--vg-root has a disk space of 17 GB, let’s add a volume, add it to the volume group and to the logical volume. We need to run following commands:
- pvcreate /dev/sdb
- vgextend debian-vg /dev/sdb
- lvextend --resizefs -l +100%FREE /dev/debian-vg/root
Lastly, we get the following result: a CX11 server with more than 100 GB local disk space: